By Ellen Russell
No wonder candles are such favorite at weddings — they’re elegant, and usually pretty affordable, too. The only catch for many brides is that they want something truly original, not something they’ve ever seen at someone else’s reception.
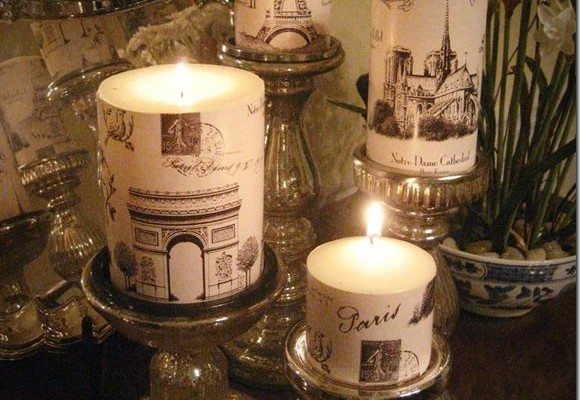
One way to make this happen is with simple decoupage techniques. Believe it or not, it’s easy to create totally original candles that reflect your wedding theme, wedding colors and most of all, your personality as a couple.
Get Out Your Artistic License
It’s simple to start — your first step is to choose whatever color and size of candles you’d like to hand out. For most weddings and showers, votives are the obvious choice, since they’re cheap and easy to find. It’s a snap to find bulk orders of 200 or more votives at a price approaching wholesale.
Next step: deciding how to decorate your candles. The wonderful thing about decoupage is that you can use almost anything that’s flexible enough to fold around the candle. Your wealth of choices include fabrics, wrapping paper, designer or scrapbook papers, or even photos of you-know-who (quality printouts here are actually better than the old-fashioned kind, as classic photos aren’t as flexible, and more prone to smudging).
Don’t just content yourself with the premade, either. You can print a favorite saying along with your names and wedding date on paper, labels or even ribbons, and apply those as well. For a natural, seasonal theme, botanicals — pressed flowers or leaves, or even silk ones — are simple to use but spectacular look at.
You can stick with one item, or overlap several of different textures and colors. The choice is yours. Be courageous … experiment with some off-the-wall ideas before you commit to a certain look. The only requirement is that your resulting creation gives voice to your life and love.
Start the Assembly Line
Now you’ve tried out various designs, and settled on a favorite. It’s time to get organized with your custom supplies. Cut out designs from your paper or fabrics, or lay out your leaves or petals, and arrange them in sets over a large tabletop, one for each candle. And then you’llneed to choose from the two main decoupage methods.
Method One — Double-Dipped Wax
The first method for applying your decorations involves melted wax. The upside to this is that your finished creations can be actually lit by your guests after the event. The cons? It requires a candle that’s 3 inches in diameter or larger to be safe, and the person lighting it needs to trim down the flammable decorations on the sides as the candle burns. So be sure to include directions to that effect if you’re handing these out.
To start, melt a block or two of colorless paraffin wax and a double boiler (or just use a large, clean coffee can placed in a larger pan of water). Be sure you’ve melted enough wax to dip the entire candle. Now:
1) Holding the candle wick, dip your candle in the melted wax, then place the dipped candle on wax paper.
2) Working quickly, apply your cutouts and decorations to the warm candle, smoothing out any wrinkles.
3) Dip the candle one more time in the melted wax, and place it back on the waxed paper.
Your finished candle will look cloudy at first, but clear up as it hardens. Want to dig a little deeper into this method? Check out the book Candlemaking for the First Time by Vanessa-Ann (2001, Sterling Publishing Co.).
Method Two — Just Use Glue
You can also apply your decoupage with glue, but the candles you make should probably only be used for decorative purposes, and it’s probably smart to add a sticker to the bottom saying so.
To start, you’ll need either a decoupage medium (found in any craft store) or ordinary white glue thinned with water. Then:
1) Using a paintbrush or foam craft brush, apply a layer of glue to your candle, making the area a little larger than the items you plan to glue there.
2) Apply your images, fabric or botanicals, smooth out any wrinkles, and let it all dry.
3) When dry, add a second layer of glue or decoupage medium over your decorations, covering them completely, plus a little extra margin beyond the edges.
4) Let the second layer of glue dry completely. Then repeat the process two or three times, always letting the glue dry, and always brushing on an extra margin over the edges of your decorations to seal them in.
Voila — your decoupage favors are done. You’ve created something that uniquely represents your personality and your life together as a couple. Now you just need to package your unique creations in something as cute as its contents … a romantic organza bag, a tulle circle or an adorable favor box.