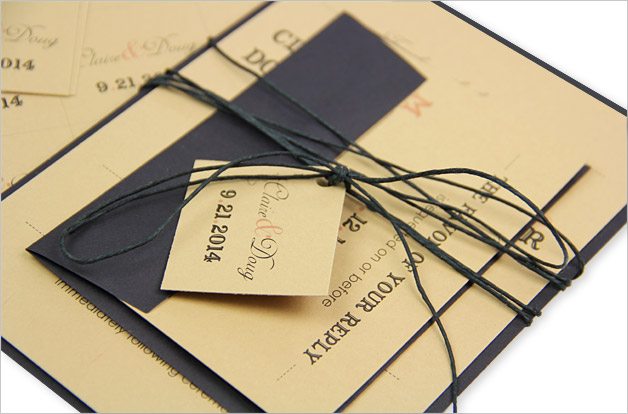
Hemp twine and earth tones make it rustic, bold fonts make it modern, and a personalized tag makes it fun like a present. Inspired by my personal obsessions with western fonts, twine wraps, and Kraft, I am very excited to share this rustic wedding invitation design template & tutorial with fellow DIYers.
Rustic Wedding Invitation Template Directions
In the tutorial below, you’ll find all the tools you need to replicate this modern design for your wedding. If this invite isn’t quite your taste, you’ll also find everything you need to tweak it to your wedding style.
Let’s begin!
_______________
Materials List
Envelopes (Gmund Colors Ebenum)
- Invitation: 5 1/4 x 7 1/4″ (A7)
- Response: 3 5/8 x 5 1/8″ (A4)
Pre-Cut Blank Cards (111lb Gmund Colors)
- Invitation Backer: 5 1/8 x 7″ (A7) – Ebenum
- Invitation Card: 4 7/8 x 6 7/8″ – Pinus
- Response Card: 3 1/2 x 4 7/8″ (A4) – Pinus
Card Stock for Tags – 8 1/2 x 11 – 111lb Pinus
Hemp Twine – Black
Paper Trimmer
Adhesive
Hole Punch
All materials for this invitation are from LCIPaper.com. For more information on materials, please visit the detailed materials list.
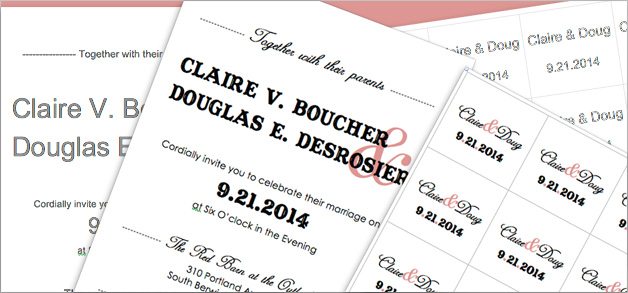
1. Download Microsoft Word Invitation Templates
Click the link below to download printing templates for your invitation, reception, and invitation tags. For your convenience, templates are sized correctly, are in standard Arial font, and include the sample wording shown below.
The download also includes instructions for printing custom sized documents using your home computer and printer.
Download invitation templates & printing instructions
2. Customize Templates
Customize invitation templates by entering your own details and changing fonts and colors to complement your event.
What fonts are shown on this design?
All of the fonts featured on this design are available as free downloads (just search free fonts)!
- Script (“Together with their parents) – AdineKirnberg-Script
- Western (Names/Date) – Captain Howdy
- Text (“Cordially invite . . .”) – Century Gothic
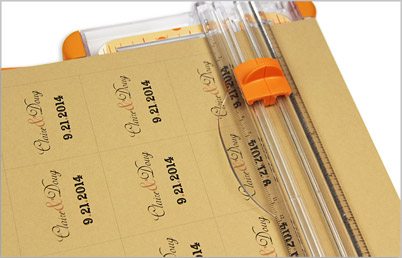
3. Print Cards & Tags
Use the instructions you previously downloaded to print your invitation card, response card, and tags.
Note: Heavyweight 111 lb Gmund Colors card stock was printed using a high end ink jet printer.

4. Cut Tags from 8 1/2 x 11 Card Stock
Using a paper trimmer (or other preferred cutting tool) cut along the printed guidelines to yield 20 individual invitation tags.
5. Punch Holes in Tags
Punch a hole in the corner of each tag using a standard hole punch.

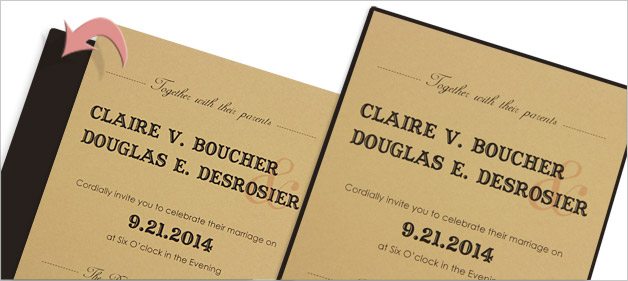
6. Adhere Printed Invitation Card to Backer Card
Adhere your printed 4 7/8 x 6 7/8″ invitation card to your 5 1/8 x 7″ backer card using the adhesive of your choice.
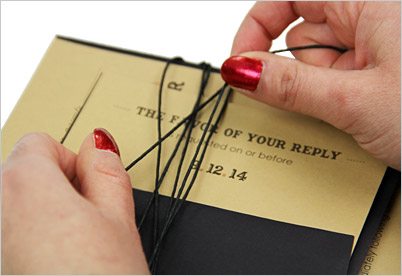
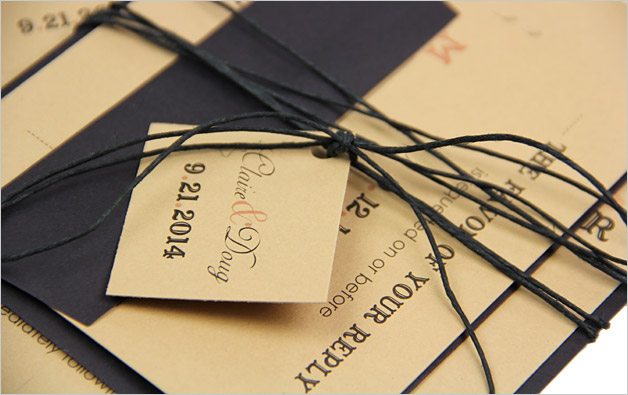
7. Wrap Twine Around Invitation & Response
Wrap approximately 40 inches of twine several times around your invitation and response card. Wrap the twine so that both loose ends end up in the front of the invitation. The beauty of twine is that it is supposed to look rough and rustic, so do not worry too much about your wrapping method.
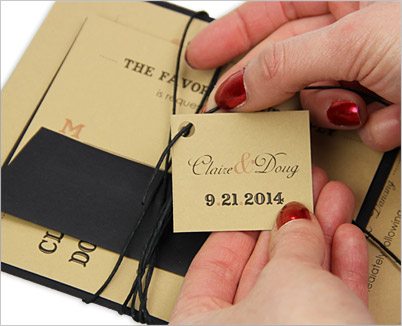
8. Fasten Tag to Twine
Thread one loose end of twine through the hole in one of your invitation tags. Letting the tag hang loosely in the center of the invitation, secure in place by tying the two loose ends into a knot or a bow
And You’re Done!
If you have any questions or comments about personalizing this design, post a comment below!
Have questions about this wedding invitation template? Comment below and Kristen will eagerly assist!
Related articles

