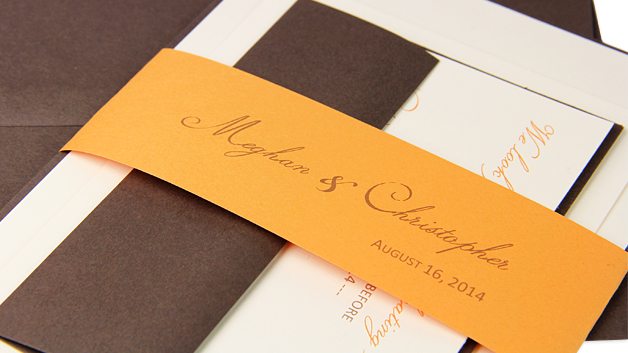
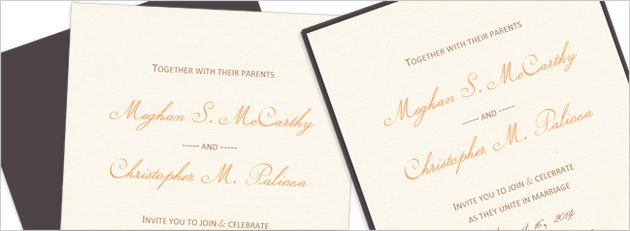
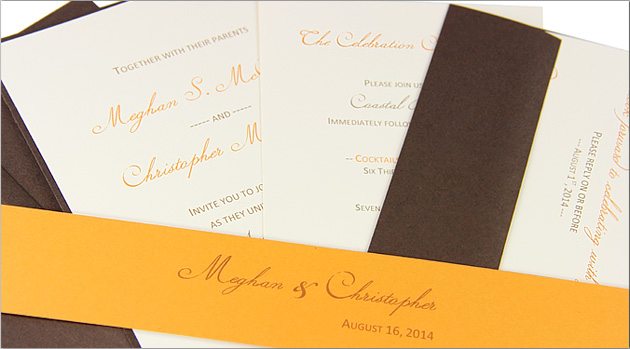
Inspired by the fantastic tangerine wedding trend and the fact that you just can’t go wrong with clean and simple, this invitation ensemble features classic ecru invitation, reception, and response cards all neatly wrapped up in a personalized band. Chocolate brown envelopes add contrast to the design, and the whole ensemble is brought together with complementary chocolate and tangerine text.
In this tutorial, you will find all the tools you need to recreate this invitation for your wedding – a materials list, printing templates, and step-by-step assembly instructions. This invitation looks great, is easy to customize and assemble, and is sure to impress. Let’s begin!

Materials Used
Envelopes (Gmund Colors Chocolate)
- Mailing – 5 1/4 x 7 1/4 (A7)
- Response – 3 5/8 x 5 1/8 (A4)
Pre-Cut Blank Cards (LCI Ecru 80lb Cover)
- Backer – 5 1/8 x 7 (A7) – (111lb Gmund Colors Chocolate)
- Invitation – 4 7/8 x 6 7/8
- Reception – 4 1/4 x 5 1/2 (A2)
- Response – 3 1/2 x 4 7/8 (A4)
8 1/2 x 11 Paper (Pop-Tone Orange Fizz 70lb Text)
Adhesive
Paper Trimmer or Preferred Cutting Tool (You can find a good paper cutter at Fiskars.com)
Microsoft Word
Printer
Want to recreate this invitation exactly as shown? Visit the detailed materials list.
(All materials for this design from LCIPaper.com)

1. Download Microsoft Word Printing Templates & Instructions
Begin by downloading the printing templates file by clicking the link below:
Download Banded Invitation Suite Templates
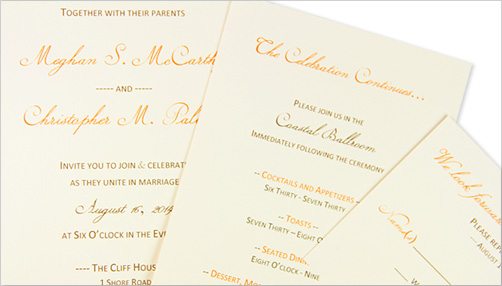
The file includes 4 printing templates:
- Invitation Card
- Reception Card
- Response Card
- Paper Bands (5 bands to (1) 8 1/2 x 11 sheet)
Instructions for printing invitations at home are also included in the file.
 2. Customize Printing Templates
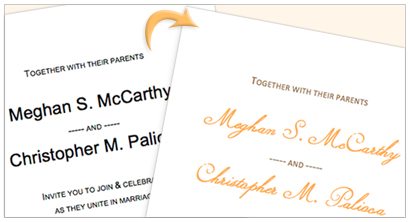
Customize templates by changing the sample wording to your own wording and experimenting with various fonts and color combinations.
Fonts pictured on this invitation are:
- Volutes (script)
- Calibri – small caps
3. Print Cards & Bands
Using your home printer and the instructions included in the templates file, print your 3 cards and customized bands.
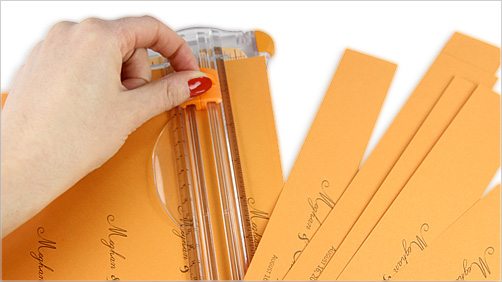
4. Cut Bands
Using a paper trimmer or other preferred cutting tool, cut (5) 1 1/2 x 11 inch printed bands from the 8 1/2 x 11 sheet by cutting along the guidelines.
Note: Although the template includes prominent dividing guidelines, the lines print only faintly on the sheet. This is to avoid remnants of the lines appearing on the bands after cutting.
5. Mount Invitation Card to Backer Card
Using glue or double sided tape, adhere your printed 4 7/8 x 6 7/8 inch invitation card to your 5 1/8 x 7 backer card.
6. Arrange Cards of Ensemble
Arrange the cards of your invitation ensemble. From bottom to top, stack:
Invitation Card
Reception Card
Response Card & Envelope
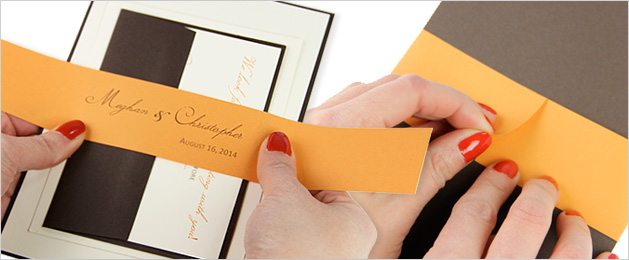
7. Wrap Band Around Ensemble
Center your band over the invitation ensemble, wrap tightly around, and secure in the back with the adhesive of your choice.
Questions?
Questions or comments about customizing this invitation design for your wedding? Get in touch! Post a comment!